How to Map Network Drive Windows 10 (Step by Step)
Learn how to map network drive windows 10 in a few clicks, what a network drive is, and why it's useful for sharing files at home or in a small office.
In this guide
Want a shared folder to show up in File Explorer like any other drive? This guide shows you how to map network drive windows 10 step by step. First, though, a quick look at what a network drive actually is and why you might want one.
Network Drive Definition
A network drive is storage that lives on your local network instead of inside your own PC. It might be a hard drive connected to the router over USB or Ethernet, or a folder shared from another computer. Anyone on the network with the right permissions can save and open files on it.
What Is a Network Drive?
Let's start small. A shared network folder is a folder that anyone on the network can open if they have permission. Access to that folder doesn't give you access to the whole drive, just to what's inside the shared folder.
A network drive works the same way, only on a bigger scale. When people talk about network drives they often mean NAS (network-attached storage): a small box of drives connected straight to your router or switch. A NAS has no keyboard or monitor. It runs a lightweight operating system that manages the drives, and you sign in to it over the network to get to your files.
How Are Network Drives Useful?
Network drives and cloud storage do a very similar job, and which one makes more sense depends on how and where you plan to use it. (Having trouble with wireless accessories while you're at it? See how to turn on bluetooth on windows 10.)
Network drives at home
Think of a network drive as cloud storage that only exists inside your home network. Say you have files on your laptop that you also want on the family desktop or a tablet. Save them to the network drive and every device on the network (with access) can open them.
They're especially good for big media libraries. A friend of ours set up a NAS on his home network years ago and filled it with music, films, TV shows and photos. Whenever anyone wanted an album, a movie or holiday pictures, they just opened the network drive.
Network drives at work
The same idea works well for small and mid-sized businesses, especially ones that work from a single office on one network. Larger companies with several sites usually lean towards cloud storage, because spreading a network drive across many networks gets complicated.
The big advantage is control. It's your drive on your network, so there are no subscription fees or provider outages to worry about (apart from your internet provider). You pay up front for the hardware and setup, and that's it.
Once it's set up, people can open and edit files straight from the drive, depending on the permissions you give them. Nobody has to email files back and forth or wonder whether they have the latest version, and nobody has to pass USB sticks around the office.
The downside is the risk of drive failure. With cloud storage a failed disk isn't your problem, but on a network drive it could take your files with it. You can protect yourself by setting up a redundant drive (several disks mirroring the main one), so if one fails, a copy is ready to go. If that sounds like too much work, a disaster recovery as a service (DRaaS) product can back up your network drives for you.
How to Map Network Drive in Windows 10
Mapping a drive gives a network location its own drive letter, like Z:, so it behaves just like a local drive in File Explorer. It's ideal for extra storage, backups, or files several people need to share. Here's how to do it.
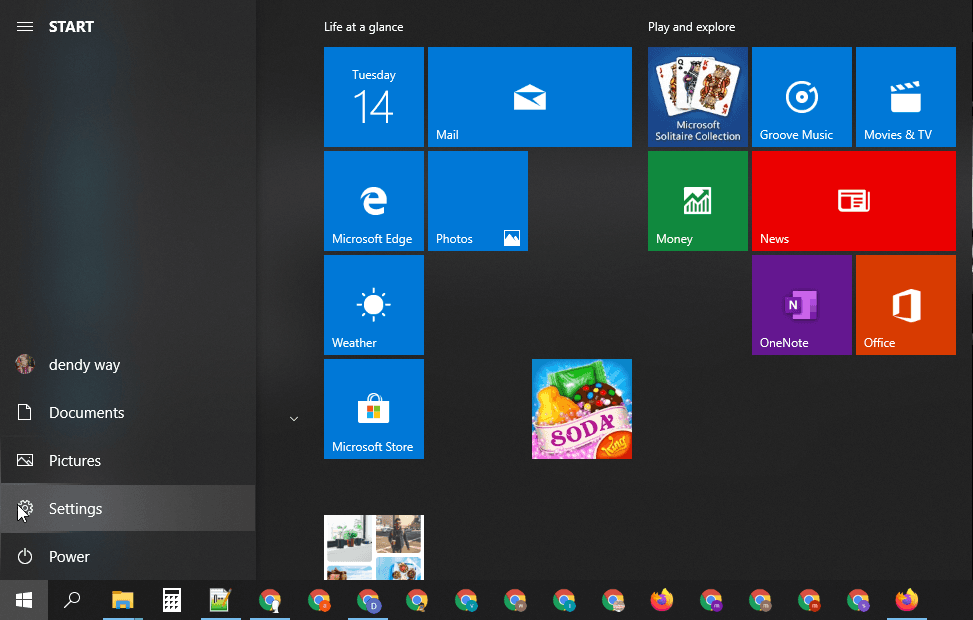
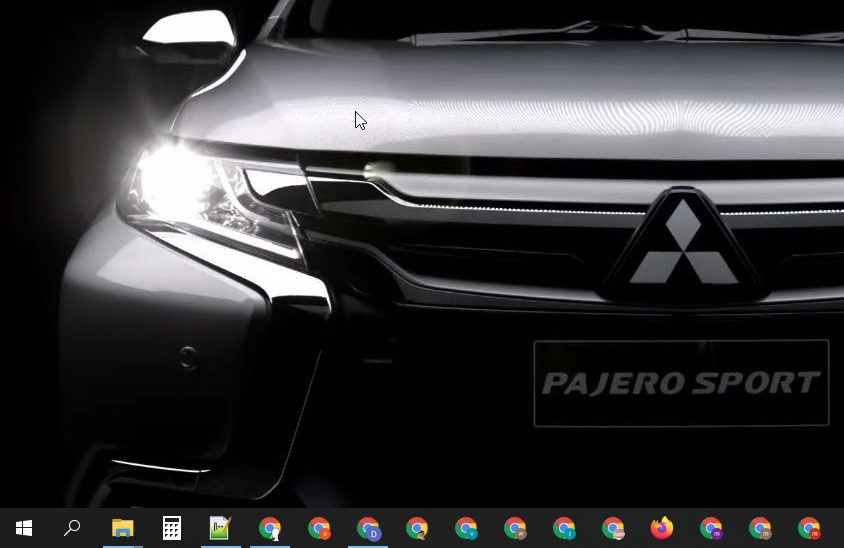
- Click the Start Menu icon in the taskbar.
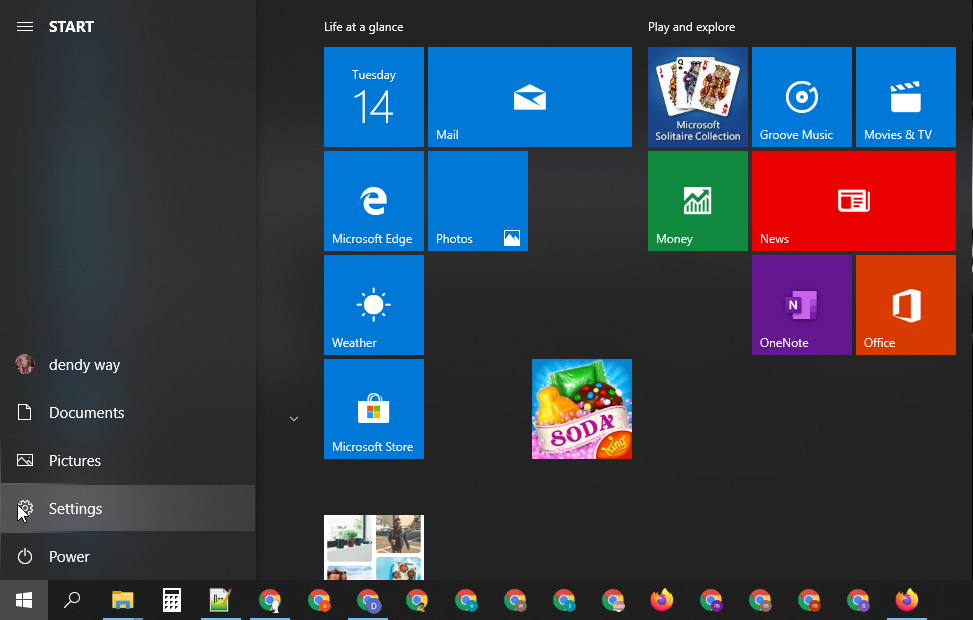
- In the Start Menu, click the Settings icon.
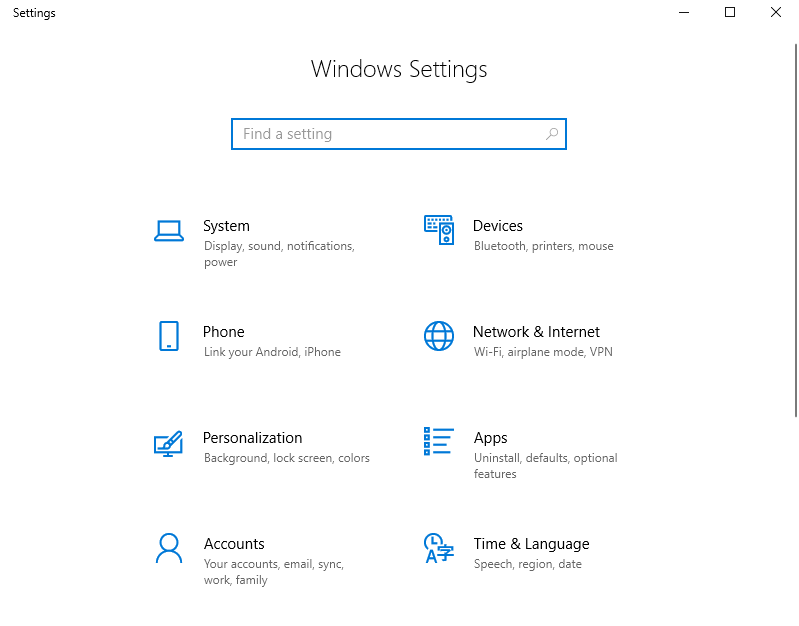
- Click Network & Internet. (You can also open Settings with Windows + I.)
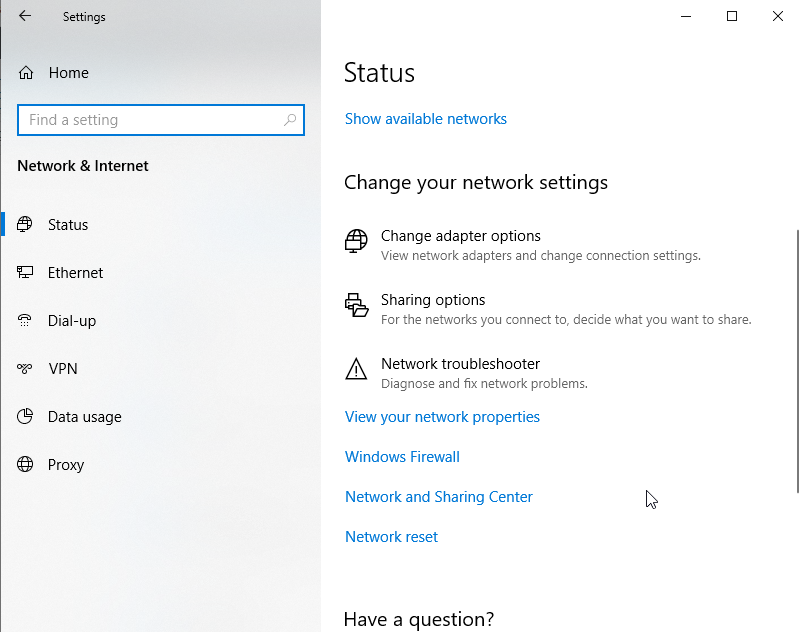
- Under Change your network settings, choose Sharing options.
- Select Turn on network discovery.
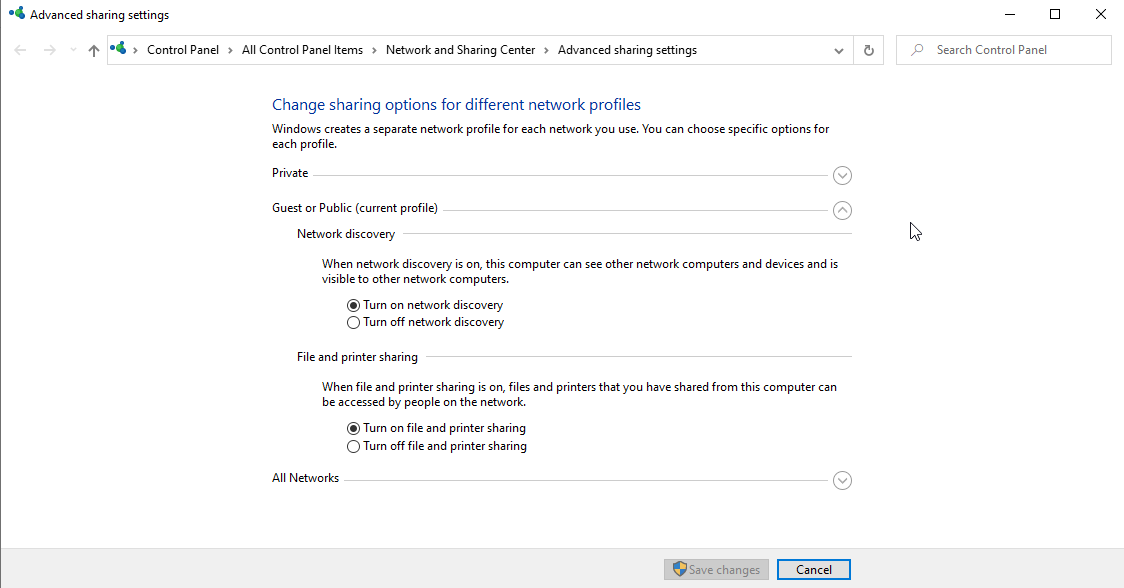
- Click Save changes. If network discovery is already on, the button is greyed out and you can skip this step.
- Click the Start Menu icon in the taskbar again.
- Press Windows Key + E to open File Explorer.
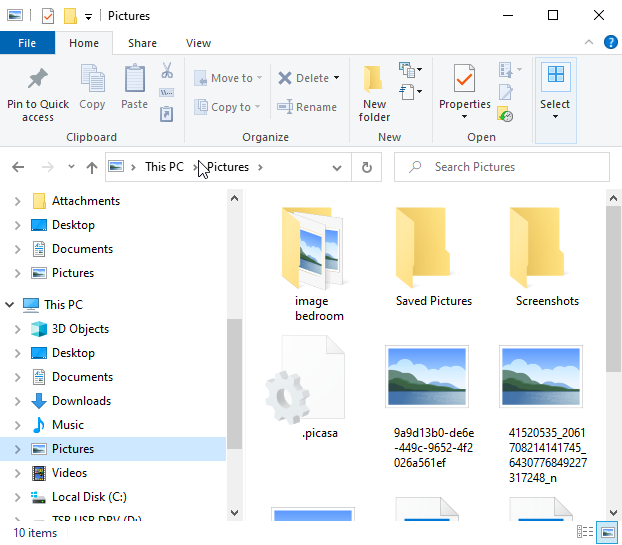
- Select This PC in the left sidebar.
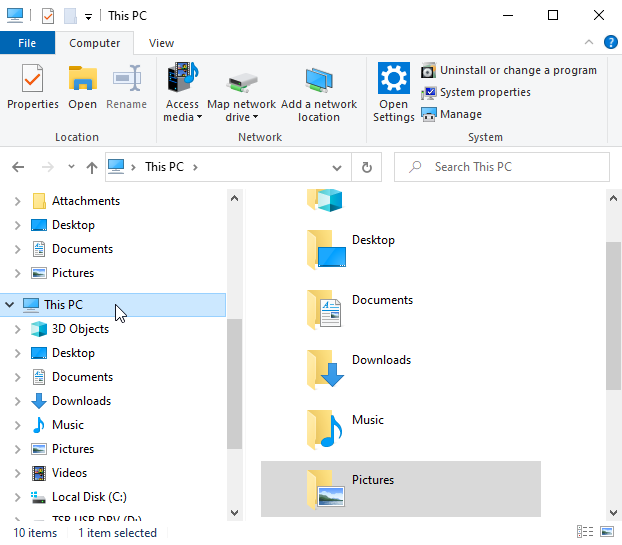
- Click the Map network drive icon.
- In the Map Network Drive window, choose a drive letter for the connection.
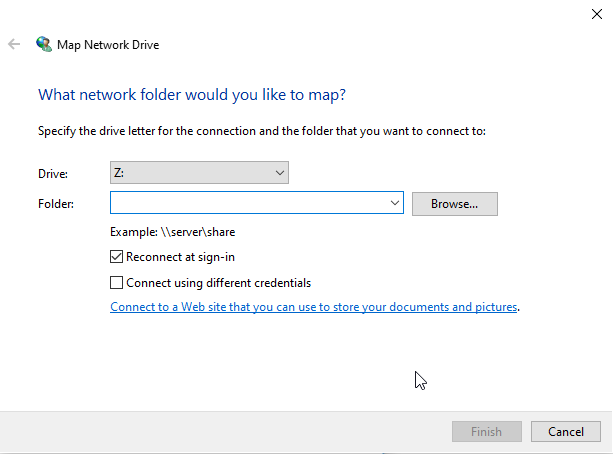
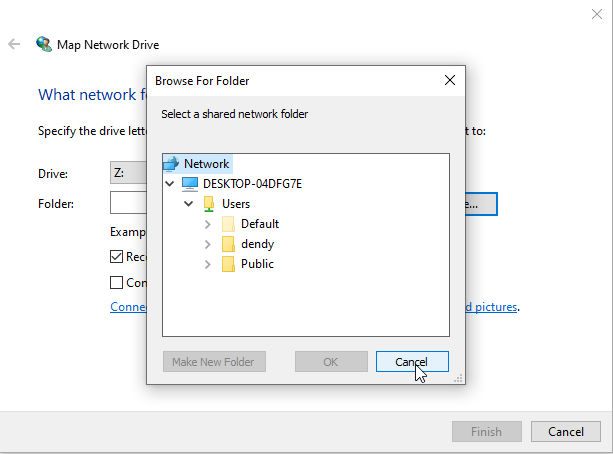
- Click Browse to pick the folder you want to connect to.
- Select the shared folder and click OK. If you're asked for a username and password, enter the credentials for the computer or NAS that holds the folder.
- Make sure Reconnect at sign-in is ticked so the drive comes back every time you log in.
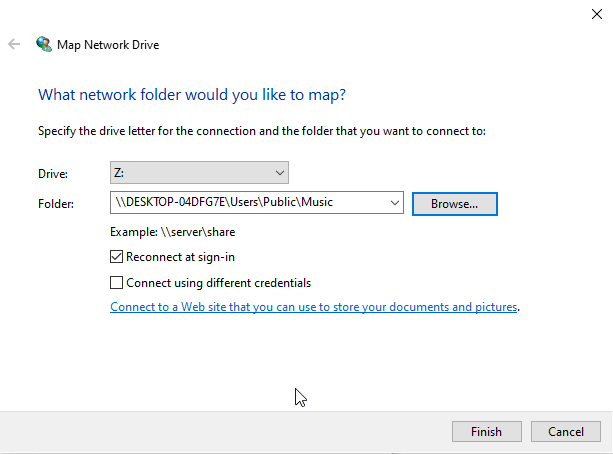
- Click Finish.
The drive now appears under This PC with the letter you chose.
References: tomshardware.com, learn.g2.com