Windows 10 Black Screen With Cursor: How to Fix It
Stuck on a windows 10 black screen with cursor after login or an update? Try Win+P, reinstall the graphics driver in Safe Mode, check BIOS display settings and disable Fast Startup.
In this guide
Every few months Microsoft rolls out a big Windows 10 update, and you can't really opt out. After some of these updates, many users hit a strange problem with no error code at all: just a Windows 10 black screen with cursor. For some people it lasts a few minutes; for others, it never goes away.
If that's happening to you after an update, or your screen goes black at random, the fixes below should help. I ran into exactly this after the Windows 10 version 1809 update, and these are the steps that got me (and many readers) back to a working desktop.
Why Does the Windows 10 Black Screen Appear?
It can be either a software or a hardware problem.
If the black screen appears after you log in, it's usually software: an incomplete Windows update, or a third-party program that starts with Windows and gets in the way of the processes Windows needs to load the desktop.
If the Windows 10 black screen with cursor appears at random or before the login screen, hardware is more likely, and very often the graphics card is involved. On PCs and laptops that have a dedicated graphics card alongside Intel's integrated graphics, an outdated driver is a common culprit.
In short, there's no single cause, and it varies from PC to PC. That's why this guide covers every fix we know of, starting with the quickest.
Black Screen With Cursor Before Login or After an Update
Use the Windows Key + P Shortcut to Switch Displays
If the screen is black before you log in, Windows may be sending the picture to a display that doesn't exist. Windows Key + P lets you switch.
- Press Windows Key + P to open the Project menu.
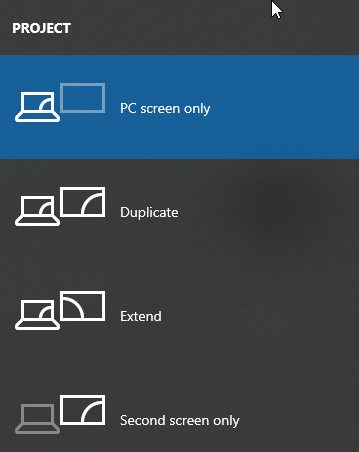
- The menu opens, but you won't be able to see it. That's normal.
- Press the up or down arrow key a few times, then press Enter.
- If it works, your screen comes back. If not, repeat a few times.
For some reason, after an update to Windows 10, the projection mode can switch to "Second screen only," and this changes it back.
When we hit this issue it took six or seven tries to get it right, so keep at it.
If your account has a password, you'll need to log in first: press Space or Ctrl, type your password and press Enter. Doing that blind can take a couple of attempts.
Uninstall Your Graphics Card Driver
If you can see the cursor, try pressing Ctrl + Shift + Esc or Ctrl + Alt + Del to open Task Manager. From there you can open Device Manager:
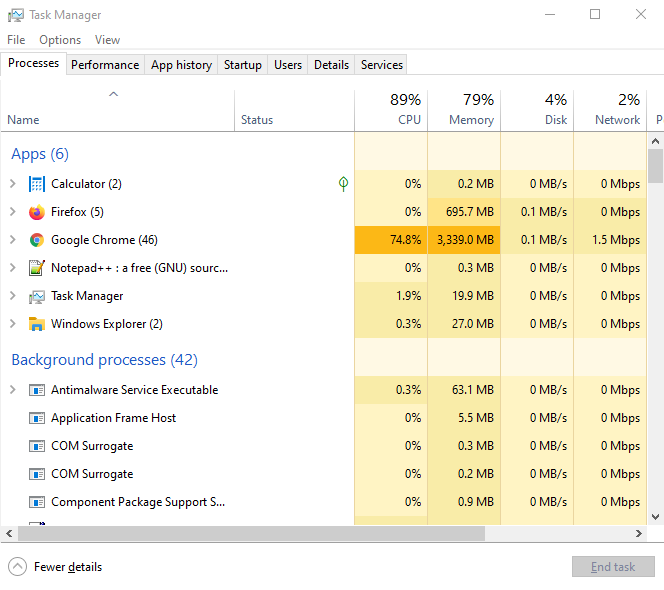
- Click File > Run new task.
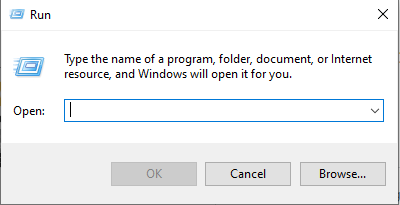 Run new task
- Type devmgmt.msc and press Enter.
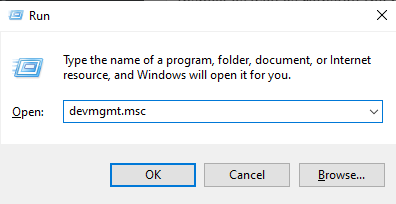
If Task Manager won't open at all, you'll need to boot into Safe Mode and uninstall the display driver from there:
- While the computer starts, keep pressing F4 or F8 (it may be a different key on your PC) to open the boot options. Windows 10 often boots too fast for this to work, so you may need to interrupt startup a few times (turn the PC off during boot two or three times) to reach the recovery screen instead.
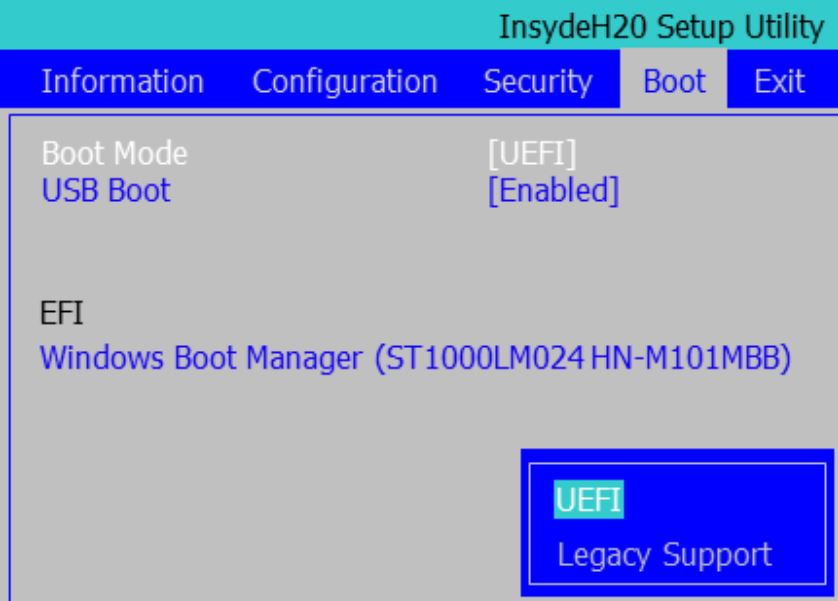 Image: forum.lenovo.com
- Choose Troubleshoot > Advanced options > Startup Settings.
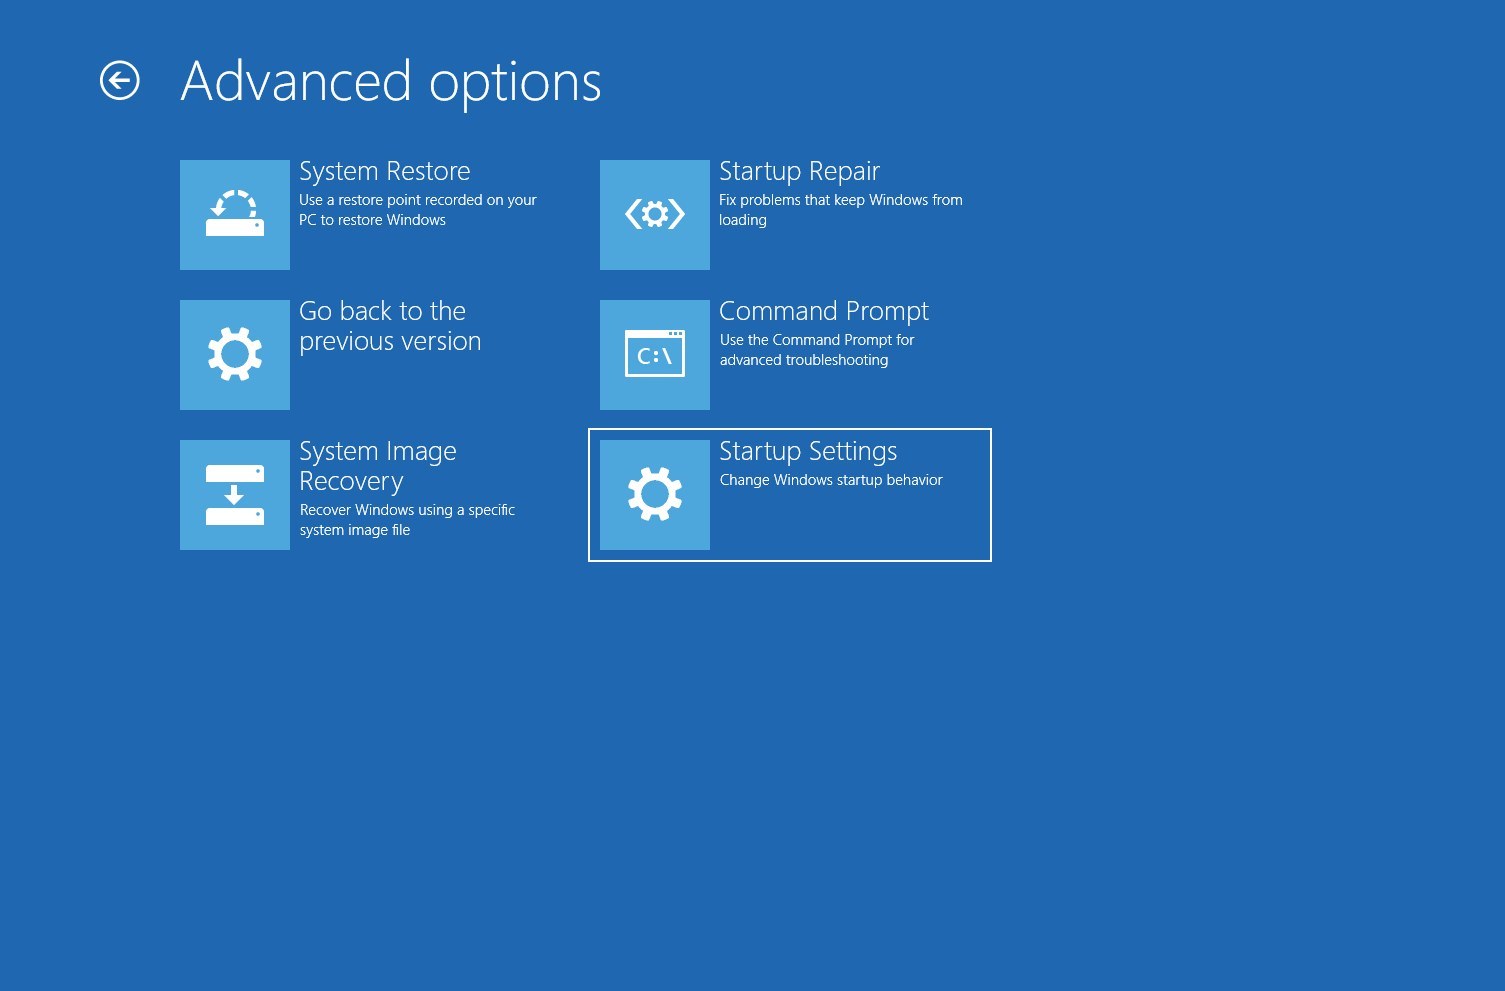
- Your PC restarts and shows a list of options. Choose Safe Mode with Networking (or another Safe Mode option).
Then uninstall the driver:
- Press Windows Key + X and choose Device Manager.
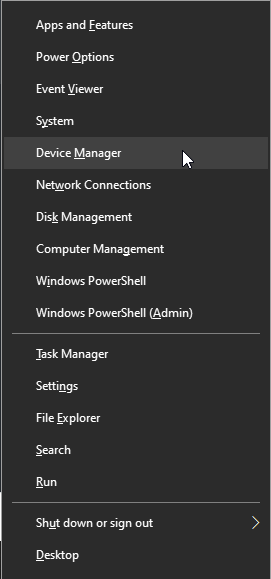
- Find your graphics card under Display adapters, right-click it and choose Uninstall device. If asked, tick Delete the driver software for this device.
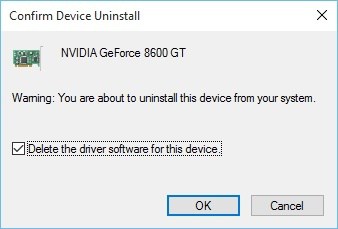 Image: windowsreport.com
- Restart your computer. Windows 10 should start normally with a basic display driver, and the black screen should be gone. Then install the latest driver from your graphics card maker. (If updates won't install, see Windows Update Stuck.)
Disable Onboard Graphics in Device Manager
If your PC has both onboard and dedicated graphics, try disabling the onboard graphics. You may need Safe Mode to do this if Windows 10 won't load.
In Device Manager:
- Find your onboard (integrated) graphics.
- Right-click it and choose Disable device.
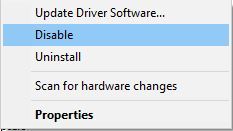 Image: windowsreport.com
- Restart your computer and check whether the problem is gone.
Disable Dual Monitor or CPU Graphics Multi-Monitor in the BIOS
- As your computer starts, press F2 or Del (it may be a different key) to enter the BIOS.
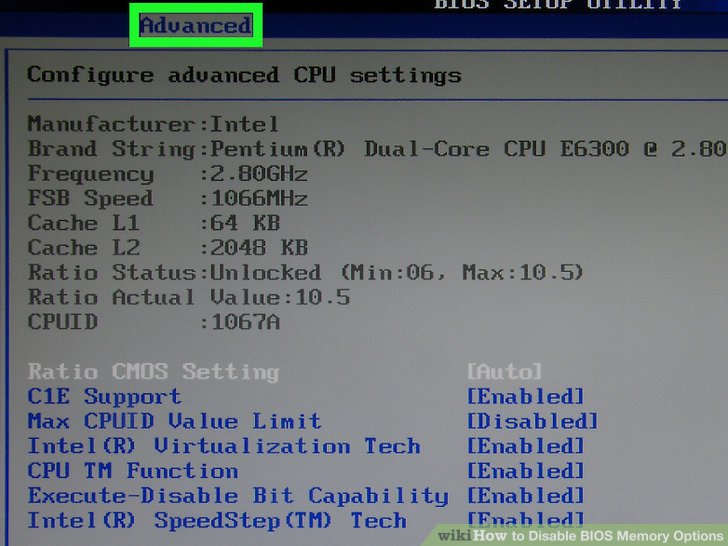 Image: wikihow.com
- Find and disable the CPU graphics or dual monitor option.
- If you see CPU Graphics Multi-Monitor, disable that too.
- Save the changes and restart.
Connect Your Monitor With Both Cables, or Add a Second Display
This one sounds odd, but several users say it fixes the black screen before login.
If your monitor has two inputs, such as DVI and HDMI, connect it to your PC with both cables.
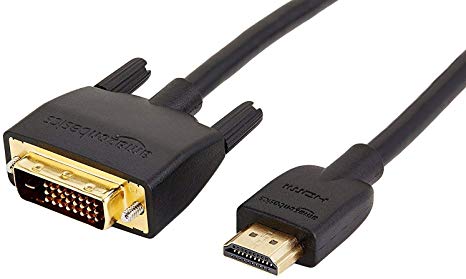
Then turn the computer on and see whether the problem is solved.
Others found that connecting a second display helps, so if you have a spare monitor, plug it in. Even if it doesn't fix the issue, the second monitor will work fine.
Update Your BIOS
Some users fixed the black screen after an update by updating their BIOS. This is a job for experienced users: if it goes wrong, it can permanently damage your motherboard. If you're not confident, ask a professional.
You'll need to download the latest BIOS for your exact motherboard model from the manufacturer's website, and read their instructions carefully.
How to update your PC's BIOS
Find your current BIOS version. Type
msinfoin the Windows search box and open System Information. The BIOS version and date are listed on the right, below the processor. Compare them with the latest version on your motherboard's support page.Enter the UEFI BIOS. When the PC starts, a message tells you which key to press. Every motherboard's interface is different, so treat these steps as a guide rather than exact instructions.
Use the built-in updater if there is one. Some motherboards can connect to the internet from the UEFI menu and download and install the latest firmware directly, which is by far the easiest option.
If yours can't, continue below.
Download the latest BIOS from the support and downloads section of your motherboard's page on the manufacturer's site.
Unzip the downloaded file.
Copy the update file to a USB flash drive.
Restart your computer and enter the UEFI settings.
Open the UEFI's firmware update tool and back up your current firmware to the USB drive, just in case.
Select the new firmware file on the USB drive and run the update. It only takes a few minutes, but never turn off the PC while it's running.
Restart when it's finished.
Some manufacturers also offer tools that update the BIOS from within Windows by running an .exe file, but the methods above are safer.
A BIOS update can bring real benefits, but it carries risk. Don't do it unless you have a clear reason, such as fixing a known problem or adding support for a newer CPU.
Uninstall Problem Applications
Some programs are known to cause a black screen with cursor after a Windows 10 upgrade, including Norton antivirus, third-party firewalls, iCloud, the Cisco VPN client and IDT Audio.
To remove them:
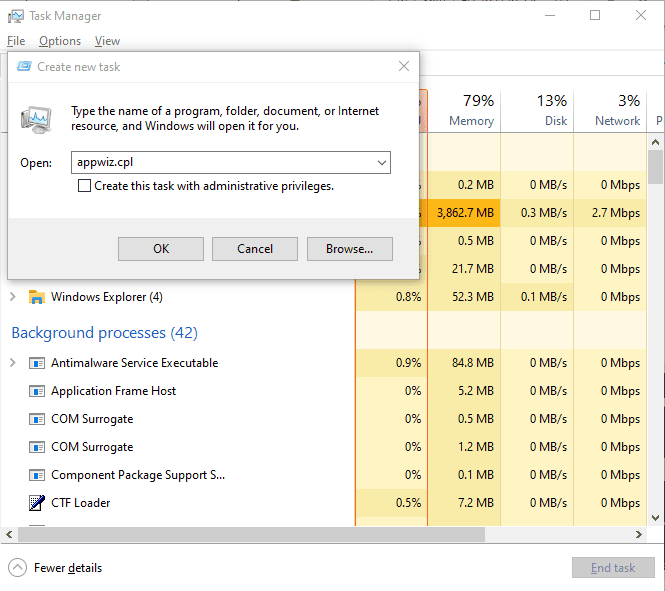
- Press Ctrl + Shift + Esc to open Task Manager.
- Click File > Run new task.
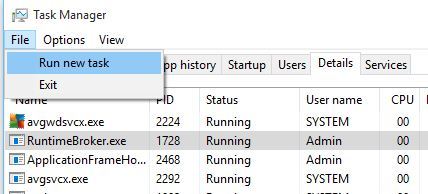
- Type appwiz.cpl and press Enter.
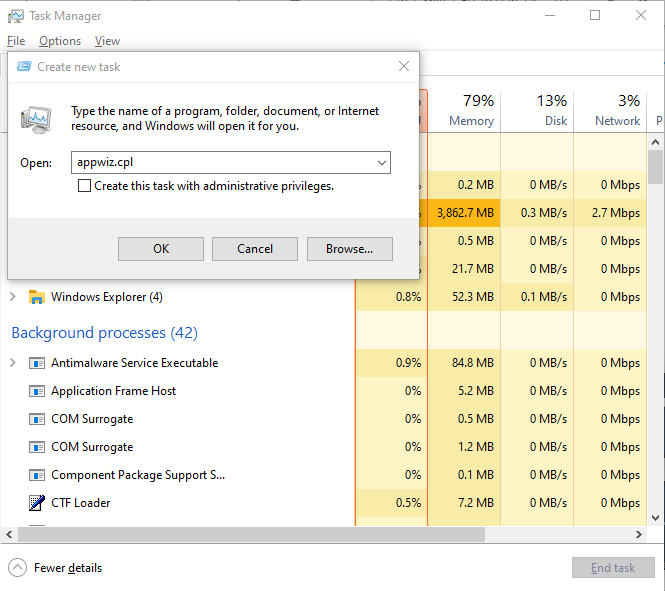
- Programs and Features opens, and you can uninstall the problem apps.
If Task Manager won't open, do this from Safe Mode. Some of these apps leave files in the System32 folder (IDT Audio, for example, creates IDTNC64.cpl). You may need to find and delete such files manually. Be very careful not to delete any core Windows files. For antivirus programs like Norton or McAfee, use the vendor's official removal tool.
Change the Display Brightness Setting
Some laptop users get a black screen only when they plug in the AC adapter. Everything works on battery, but the screen goes dark as soon as the charger is connected.
This is caused by a display brightness setting, and it's easy to fix:
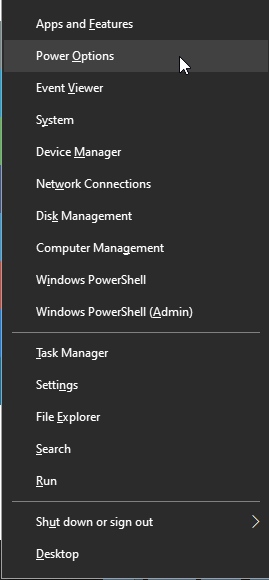
- Press Windows Key + X and choose Power Options.
- Find your current plan and click Change plan settings.
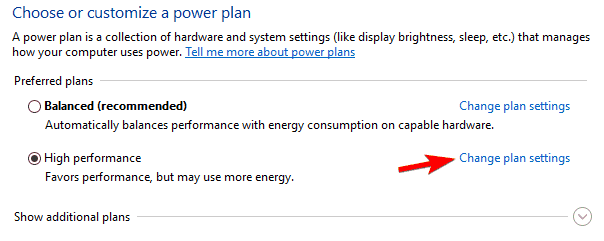
- Click Change advanced power settings.
- Find Display brightness and set the Plugged in value to 99% or 98%. Setting it to 100% while plugged in seems to trigger the problem.
- Save your changes and restart.
Disconnect Your Second Monitor
In some cases, simply unplugging your second display fixes the black screen with cursor. NVIDIA users in particular have reported this, so it's worth a try.
Disable the Secondary Output in Device Manager
You can also try disabling the secondary display output. This isn't ideal if you use two or more monitors.
- Open Device Manager.
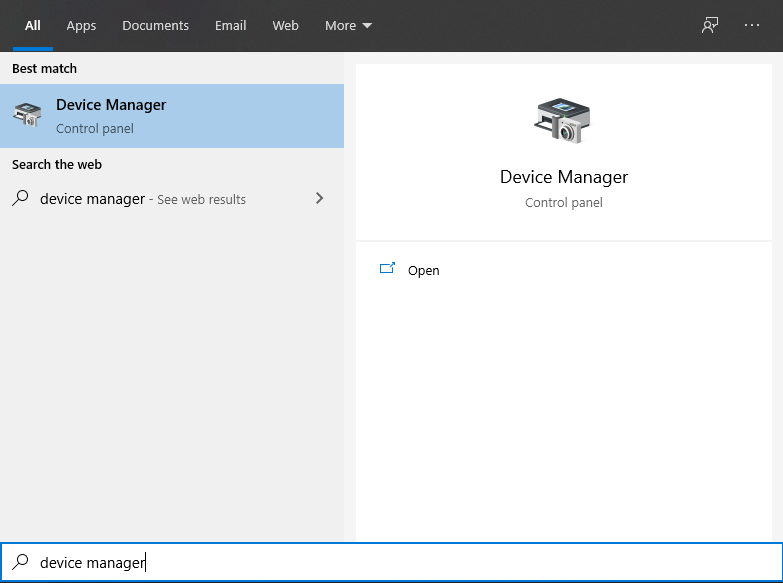
- Expand Display adapters.
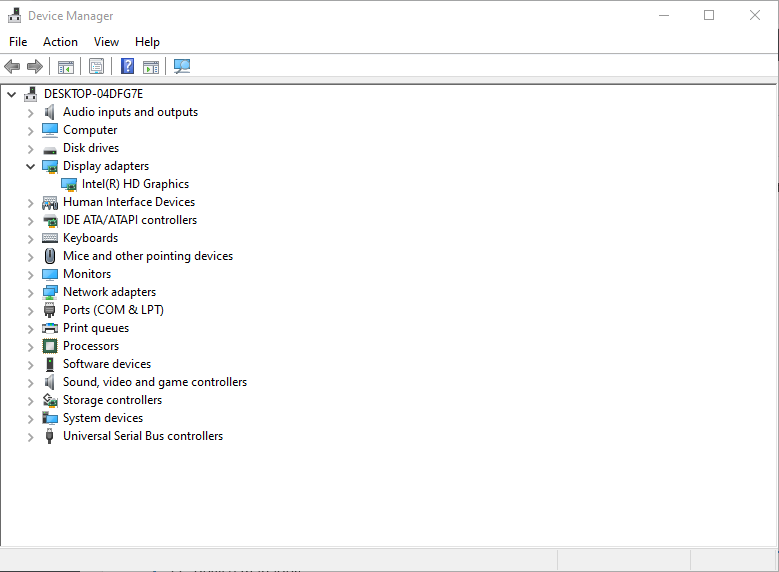
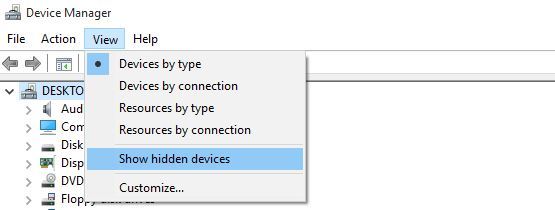
- Click View > Show hidden devices.
- Under Display adapters, right-click the secondary output and choose Disable device.
Image: windowsreport.com
- Restart your computer and check whether the problem is fixed.
Set the Display Output to IGFX
Some users fixed the black screen before login by setting the display output to IGFX in the BIOS:
- While your computer starts, keep pressing F2, F4 or Del to enter the BIOS. It may be a different key, so you might need a few tries.
- Find the display output setting and set it to IGFX. This makes your integrated graphics the primary display.
- Save the changes and exit.
Connect Your Display Using HDMI
If you get a black screen with cursor before login, try connecting your monitor with an HDMI cable instead of DVI. Several users report that this alone fixes it.
If both HDMI and DVI are connected, your PC may treat the DVI connection as a second monitor even if you only have one screen. In that case, set your main display:
- Open Settings and choose System.
- Go to Display.
- Select the display you want as your main one and tick Make this my main display.
- Click Apply.
Switch Between Dedicated and Switchable Graphics in the BIOS
Some users fixed this by enabling or disabling the dedicated graphics card in the BIOS. Enter the BIOS and look for the graphics settings.
You'll typically see a choice between Switchable and Discrete. Choose Discrete to always use the dedicated card. The exact options differ between manufacturers, so check your manual if you can't find them.
If Windows 10 doesn't detect your graphics card at all, check AMD's or NVIDIA's support pages for their troubleshooting steps.
Check Your Graphics Card Settings in the BIOS
In the BIOS, make sure your graphics card is set to use the PCI-E slot. Occasionally this changes to PCI; if so, switch it back to PCI-E and save.
Remove the CMOS Battery to Reset the BIOS
If nothing else works, you can reset the BIOS by removing the small CMOS battery on the motherboard for a few minutes. On some computers this may void the warranty, so check first, and if you're not comfortable opening your PC, ask a professional.
Disable Fast Startup
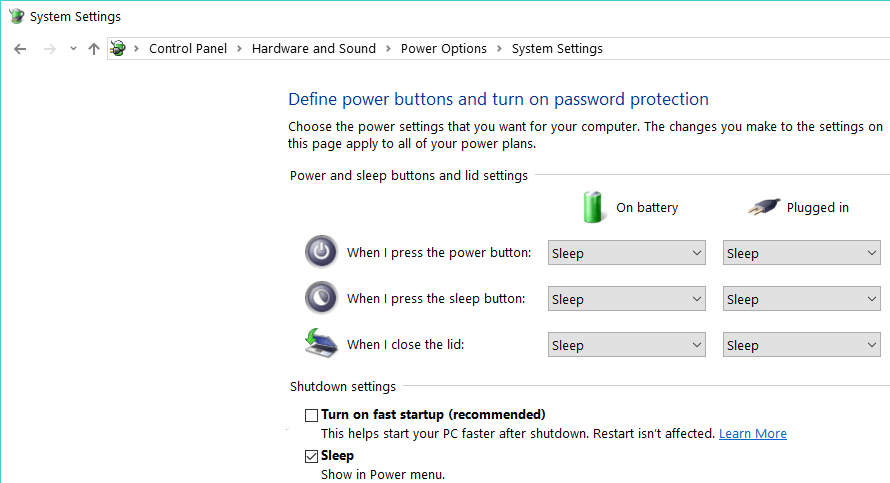
Fast Startup can sometimes cause black screen problems. Turning it off is quick:
Go to Control Panel > System and Security > Power Options, click Choose what the power button does, then Change settings that are currently unavailable, and untick Turn on fast startup (recommended).
Black Screen With Cursor During Installation
Check for Extra Displays
Make sure no other screens, such as a second monitor or a TV, are connected to your HDMI port.
If something is connected via HDMI, Windows 10 setup may use it as the main display. Before you start the installation, make sure only one screen is connected.
Alternatively, connect your main monitor using the HDMI cable, or simply unplug the other display.
Connect Your Monitor to the Integrated Graphics
Sometimes Windows 10 setup doesn't recognize the dedicated graphics card. The workaround is to plug your monitor into the motherboard's video output (integrated graphics) instead.
That usually gets rid of the black screen. You can switch back to the dedicated card once Windows is installed and its driver is set up.
Uninstall Problem Software Before Upgrading
If you're upgrading to Windows 10, some programs can cause a black screen with cursor during installation.
Antivirus software and firewalls are common culprits, so consider removing them temporarily before upgrading.
Also uninstall tools that change Windows' appearance, such as OldNewExplorer or Classic Shell, before you upgrade.
How to Start Windows 10 in Safe Mode
Safe Mode loads only the essentials Windows needs to run. If a program or download has broken something, it's the best place to figure out what's wrong and fix it. But first make sure Safe Mode is really what you need.
Rule Out the Simple Stuff First
If your PC is just slower than usual, or only one program is misbehaving, you probably don't need Safe Mode. Try the basics first: a simple restart fixes a surprising number of problems, and a slow or briefly frozen computer doesn't always mean something serious is wrong.
If you've tried everything else, here are two ways to boot into Safe Mode.
1. If Windows starts normally
Go to the sign-in screen, hold down Shift and click Restart. Or press Windows + I to open Settings, click Update & Security, choose Recovery in the left pane, and click Restart now under Advanced startup. Both take you to the advanced troubleshooting menu.
2. If Windows won't start normally
If Windows fails to start twice in a row, it should show the recovery options automatically. Click Advanced options from there.
On some computers you can press F8 during startup to reach the recovery screen faster, though many manufacturers have disabled this because PCs now boot too quickly to catch it.
Booting Into Safe Mode
From the advanced troubleshooting menu, click Troubleshoot > Advanced options > Startup Settings, then Restart. When the list of options appears, press 4 to choose Enable Safe Mode.
If you need to boot into Safe Mode repeatedly, open System Configuration (msconfig), tick Safe boot on the Boot tab and click OK. Windows will keep starting in Safe Mode until you go back and untick it.
Now You're in Safe Mode
From here you can uninstall drivers or programs, run scans and narrow down what's causing the problem. It may take some trial and error. And if you'd rather get expert help, it's never too late to call a technician.
References: windowsreport.com, bouncegeek.com, productivitybytes.com, pcworld.com