Headphones Not Working Windows 10? 5 Ways to Fix It
Headphones not working windows 10 or not showing in playback devices? Set them as default, update the audio driver, disable jack detection and fix Bluetooth headphones.
In this guide
Plugged in your headphones and got nothing? Or maybe they don't even show up in your playback devices? If your headphones not working windows 10 problem started out of nowhere, or right after an update, you're in good company.
We know how annoying it is to lose sound just when you need it, so below are the quickest fixes we know. Most of them take a couple of minutes and need no technical knowledge.
This guide focuses on wired headphones that aren't detected when plugged in, plus a section on Bluetooth headphones further down.
How to Fix Headphones Not Working in Windows 10
There are several possible causes, but the most common is an audio driver problem. Try these fixes one at a time until your headphones work again.
Plug In the Headphones and Restart Your Laptop
The first step for almost any Windows problem: restart.
- Plug in your headphones to the audio jack.
- Restart the computer with the headphones still plugged in.
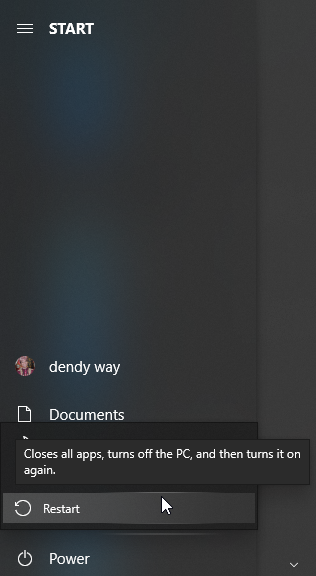
Check whether you have sound. If not, keep going.
Set Your Headphones as the Default Device
Sometimes Windows 10 doesn't switch to your headphones automatically when you plug them in. Here's how to make them the default output:
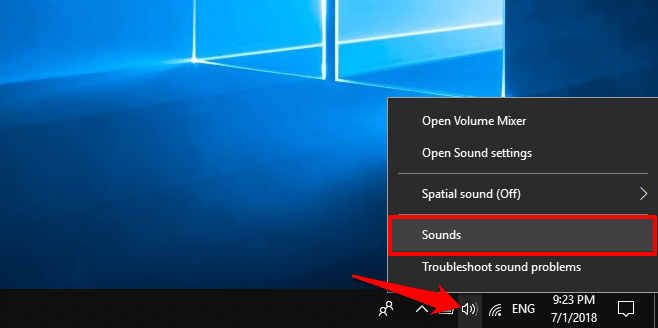
Step 1: Right-click the speaker/headphones icon in the bottom-right corner of the taskbar and choose Sounds.
Step 2: In the Sound window, open the Playback tab and check whether Speakers/Headphones is set as the default device.
Step 3: If it isn't, select Speakers/Headphones and click Set Default.
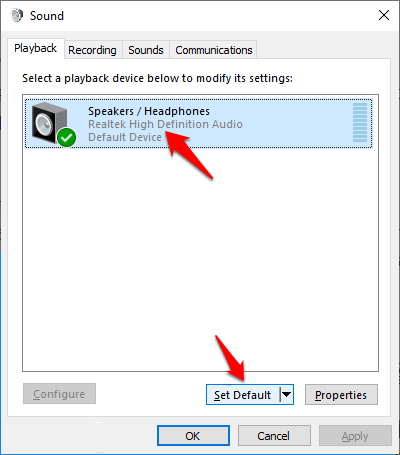
Step 4: Click Apply, then OK.
Restart your laptop or PC and check again. If the headphones still don't work, try the next method.
Update Your Audio Driver Manually
A corrupt or mismatched audio driver is the most common reason headphones stop working, along with many other Windows 10 sound problems. Switching to the generic Windows driver often fixes it:
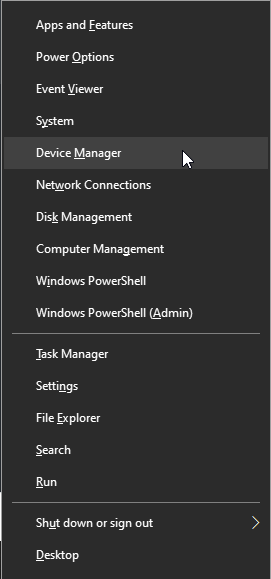
Step 1: Right-click the Start button and choose Device Manager.
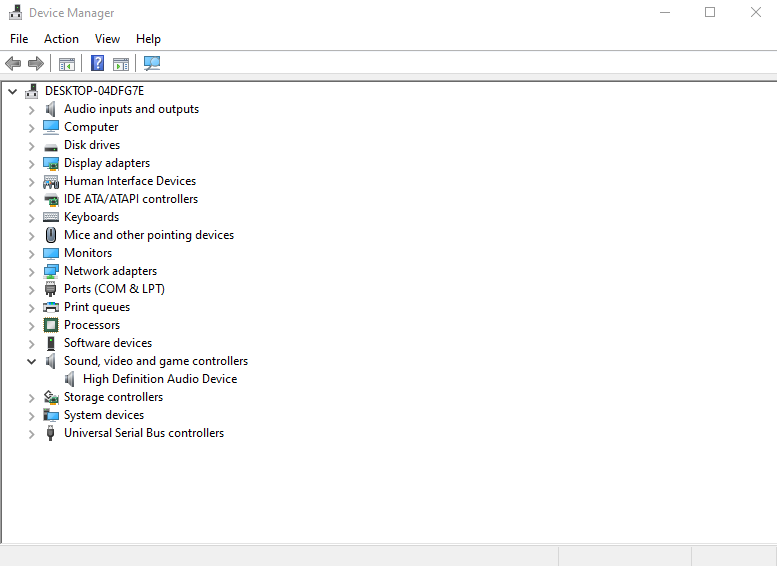
Step 2: Expand Sound, video and game controllers.
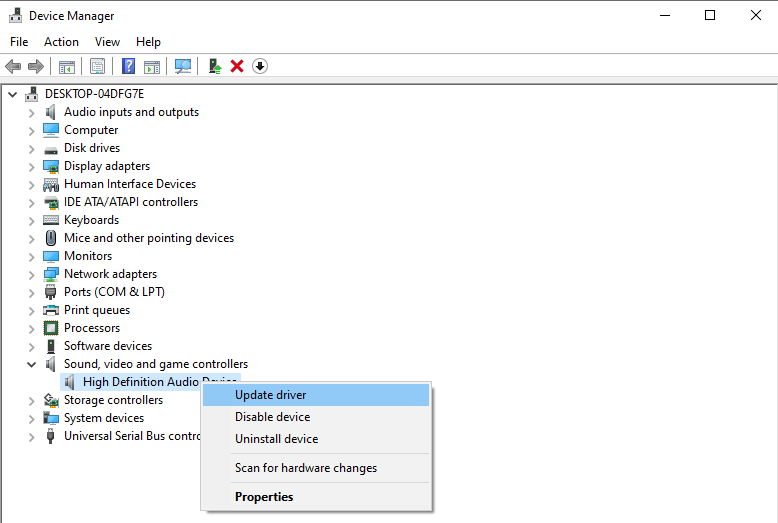
Step 3: Right-click your audio device (for example High Definition Audio Device or Realtek High Definition Audio) and choose Update driver.
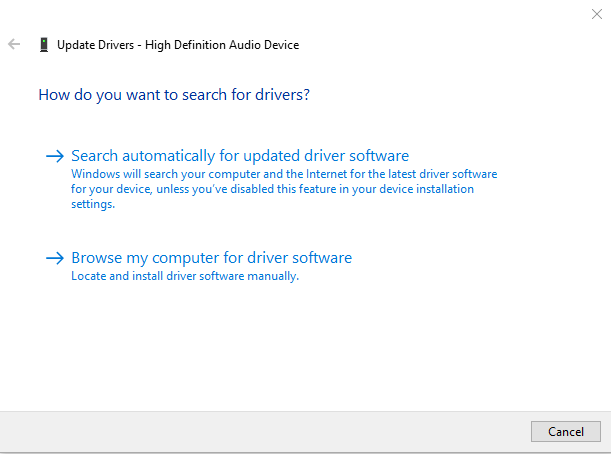
Step 4: Choose Browse my computer for driver software.
Step 5: Choose Let me pick from a list of available drivers on my computer.
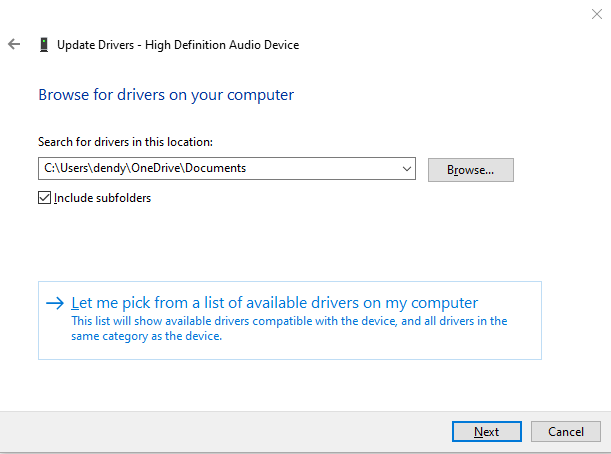
Step 6: Select High Definition Audio Device and click Next.
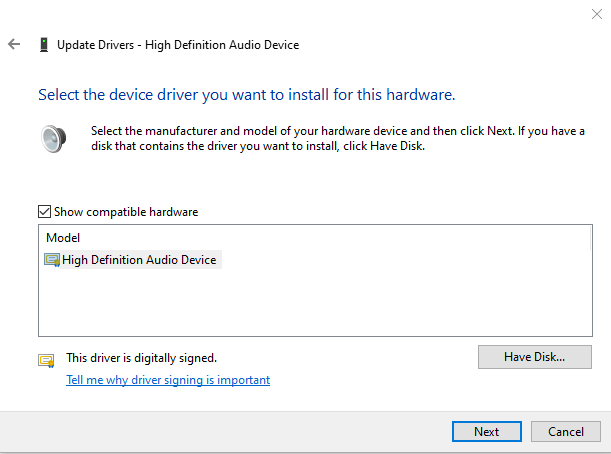
Step 7: If you see an Update Driver Warning, click Yes.
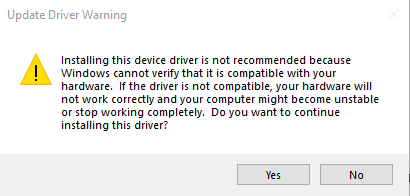
Restart your system and check whether the headphones not working windows 10 problem is solved. Of all the fixes here, this is the one that works for the most readers, so don't skip it.
Disable Front Panel Jack Detection
If your PC uses the Realtek High Definition Audio Driver, the Realtek HD Audio Manager may be ignoring your front headphone jack. Turning off jack detection usually fixes that.
Step 1: Type control panel in the Start search and open it.
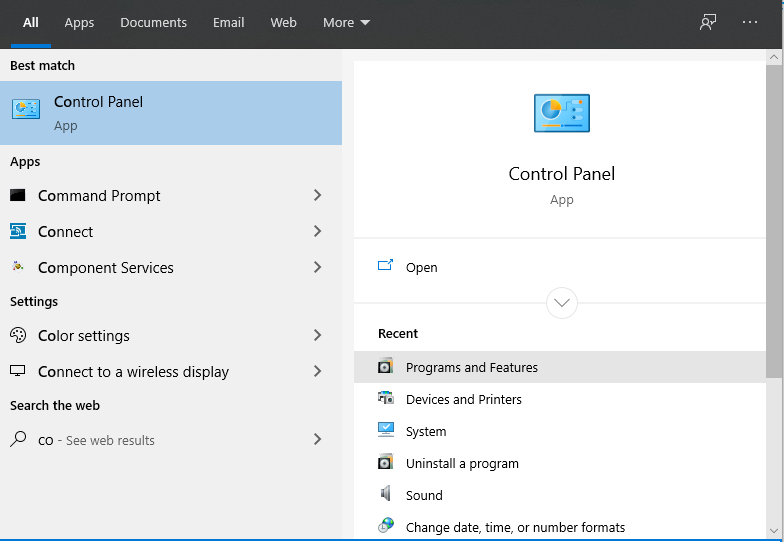
Step 2: In Control Panel, set View by to Large icons.
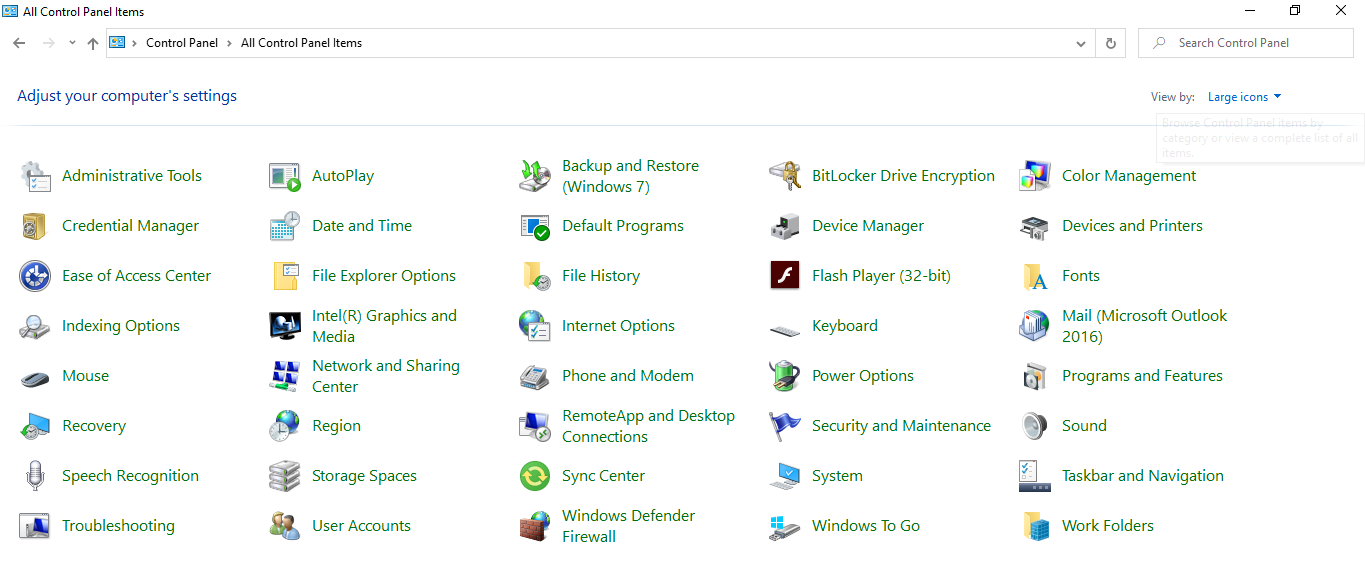
Step 3: Find Realtek HD Audio Manager and open it.
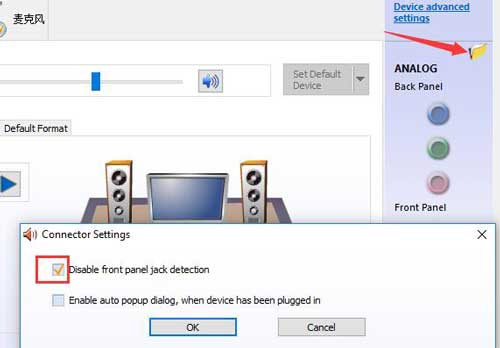
Step 4: Click the small folder icon in the top-right corner (connector settings).
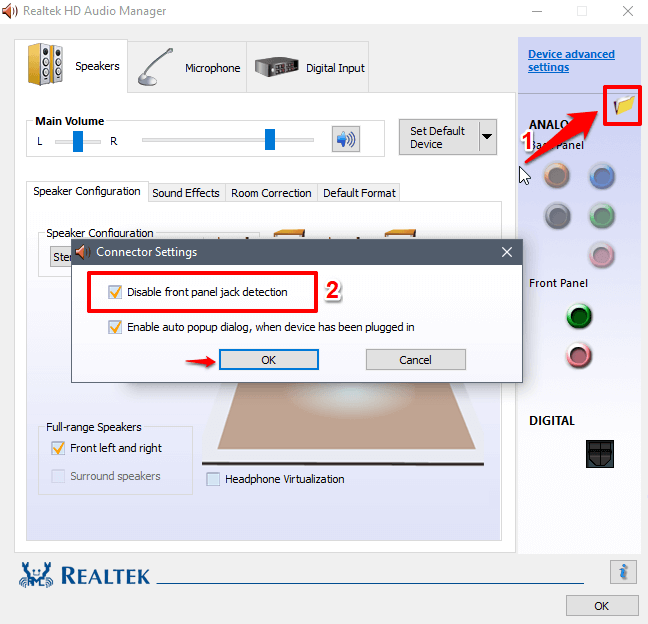
Step 5: Tick Disable front panel jack detection and click OK.
Restart your PC. Your headphones and other audio devices should now work normally.
How to Fix Bluetooth Headphones Not Working in Windows 10
Bluetooth headphones bring their own set of problems, especially after updates like the Creators Update. These fixes cover the usual ones. (Seeing high disk usage while you're at it? Read about the windows modules installer worker.)
Enable the Bluetooth Support Service
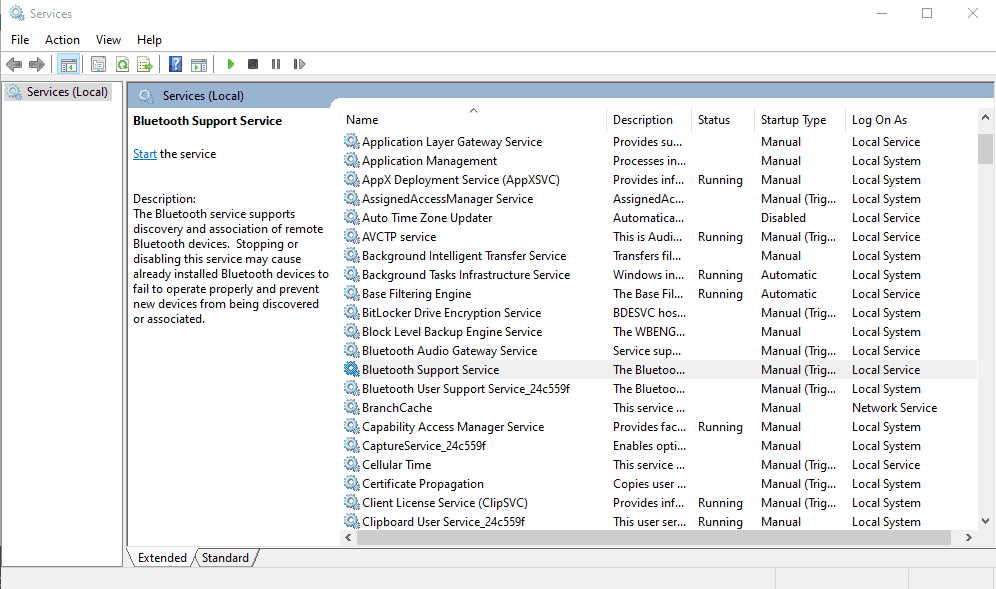
Before anything else, make sure the Bluetooth service is actually running:
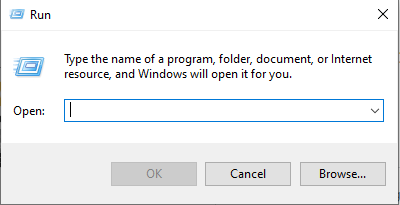
Step 1: Press Win + R to open Run.
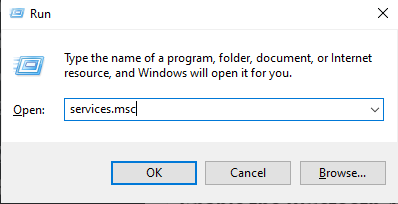
Step 2: Type services.msc and press Enter.
Step 3: Find Bluetooth Support Service and double-click it.
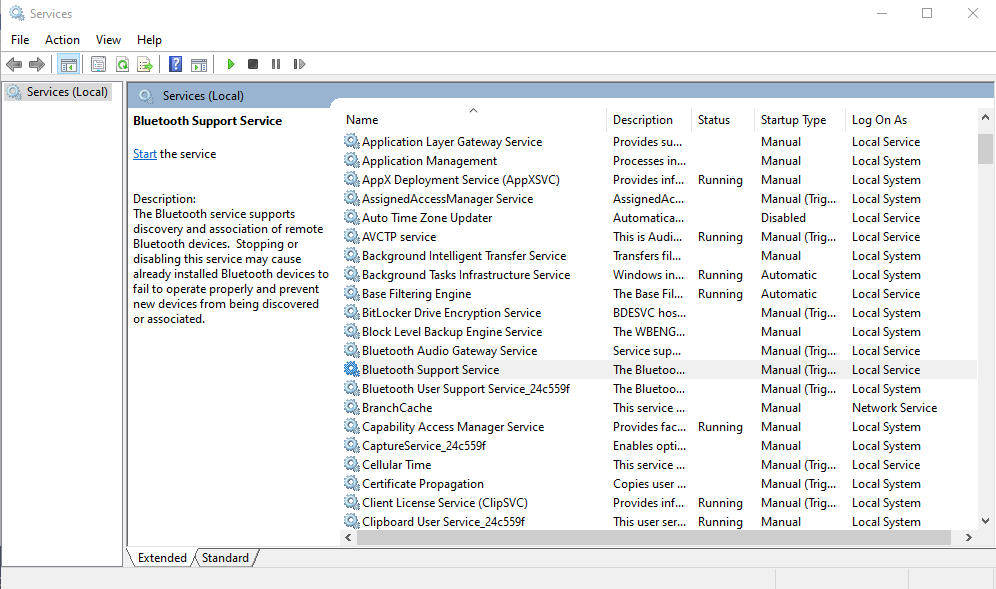
Step 4: On the General tab, set Startup type to Manual (or Automatic) and click Start under Service status.
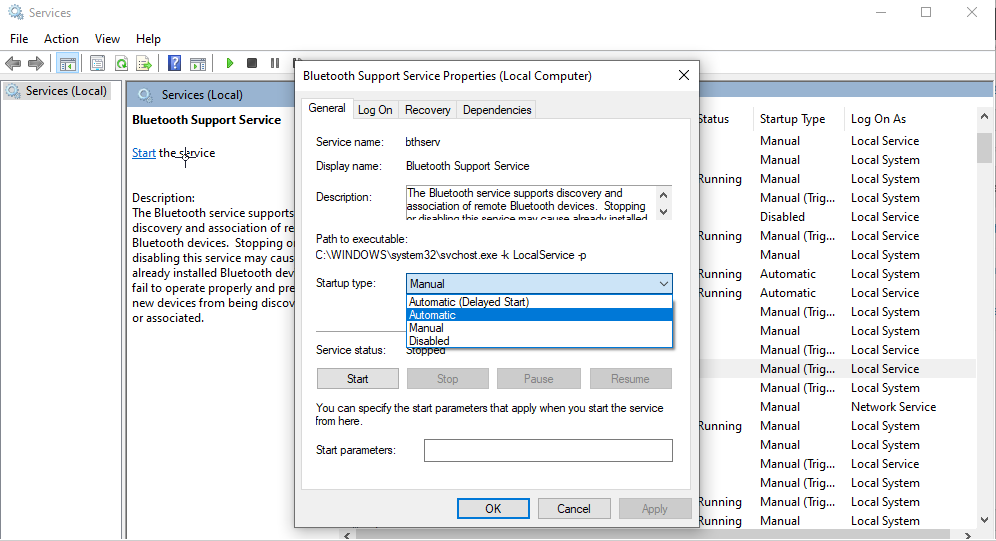
Step 5: Click Apply and OK.
Try connecting your Bluetooth headphones again. If they still don't work, continue.
Change the Realtek HD Audio Manager Settings
The Realtek audio software can also stop Bluetooth headphones from playing sound. If it's installed, turning off front panel jack detection often brings the sound back.
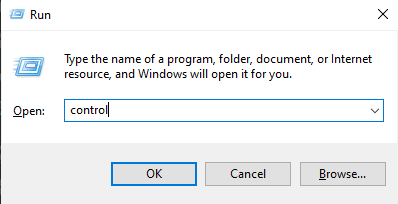
Step 1: Press Win + R to open Run.
Step 2: Type Control Panel and press Enter.
Step 3: Find Realtek HD Audio Manager and open it.
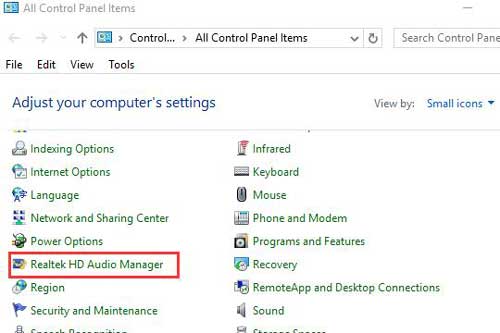
Step 4: Under connector settings on the right, tick Disable front panel jack detection. Your Bluetooth headset and other audio devices should start working.
Set the Headphones as the Default Playback Device
Several users who had this problem fixed it simply by making the headphones the default device:
Step 1: Right-click the speaker icon in the notification area and choose Playback devices (or Sounds, then the Playback tab).
Step 2: Select your headphones and click Set Default. Sound should switch to your headphones.
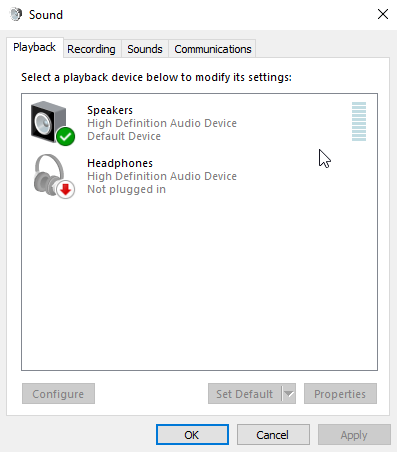
If you only see an entry called Speakers/Headphones, select that and click Set Default.
Still no luck? Leave a comment describing your headphones and what you've tried, and we'll do our best to help.
References: zerodollartips.com, drivethelife.com